Plugin Manager - Installer Help - Configuration
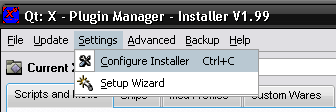
To configure the program, goto the settings menu at the top then select Configure
This will open up the configuration dialog.
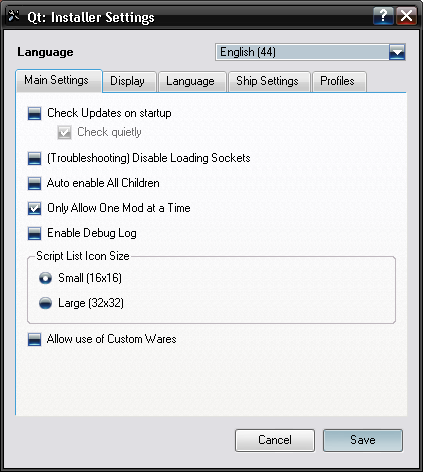
In the configuration Dialog, there are various tabs with different settings, select each tab for the different settings.
The first option at the top is for the Language, select this your language and the text in the program will be changed to that language when you goto "Save".
1. Main Settings Tab
- Check Updates on Startup: This option will cause the program to check the server for any updates to the program and allow you to automatically download and install them
- Check Quietly: This will make the update check done in the background instead of displaying the progress dialog of the update.
- Disable Loading Sockets: This is for troubleshootings, sometimes there are problems with loading the program. Some firewalls might block the program from running correctly due to the sockets. This turns of the socket to prevent these problems, you can also run the game with the, -nosocket, switch. The socket is used for other instances of the program to detect if any are running. This allows you to double click on spk files in explorer and have them i=installed in the currently running installer, rather than opening a new one to install.
- Auto Enable All Children: With this option selected, the Installer will enable all children packages when you enable the Parent. IE, if you have 2 packages, the 2nd needs the first one to be installed, then this will be a "Child" package
- Only Allow One Mod at a Time: This will automatically disable any other mod files if you install one. IE, if you install both XTM, and XFP, the Installer will only allow one to be enabled at a time. Enabling the other will automatically disable the other. This option is of no use when using Mod Profiles, as the mod profiles automatically disable all other mods anyway.
- Enable Debug Log: This is used to help debug problems if there are any, the debug log is written to a text file in the main program directory.
- Script Icon Size: This is the size of the icons in the script list, can be either small (16x16), or large (32x32)
- Allow use of Custom Wares: This will enable custom wares to be used in the game
2. Display Tab

- Show Package Description: Enabling this option will display the descriptions panel of the currently selected package under the package list.
- Display Mode: This allows you to set what items are displayed on the main window
- Simple Display: Disabled all the display options
- Advanced Display: Enabled all the display options
- Custom Display: Allows you to select each item to be displayed
Custom Display:
When selecting the Custom Display Option, you will be able to select each of the display options, this is not visible when you select either simple or advanced display.

- Package List Controls: The buttons that appear underneath the package list that allows you to install/uninstall, enable/disable, etc
- Custom Wares: This will disable the custom wares tab, Custom wares will still work, it just wont display the list of wares and the selection for the mods.
- Default Script Directory: This hides the Default Script Directory setting
- Base Mod: This hides the base mod selection so you cant change the base mod, if you use the profile system, it can be changed automatically for you
- Mod Profiles: This disabled the Mod Profiles tab
3. Language Settings

The language settings are for renaming of the text files to prevent the readtext errors in the game.
- Rename Text Files
- Set Language Automatically: This will adjust the language for the text file automatically based on the games language setting
- Dont Bother: This disables the text file renaming feature.
- Current Language: Renames the text files to match the currently selected language of the Installer.
- Selection: This allows you to select a different language to rename too, the languages are in the list are the languages that are available for the installer.
- Custom: If the language you want isn't in the list above, then you enter it manually, you need to find the id of the version your game is. The language ids are based on international dialing codes for telephones.
- Adjust Game Language: This will atuomatically adjust the games language to match the selection above, doesn't work when you set it to automatic.
4. Ship Settings

The ship settings are specifically when isntalling new Ships into the game.
- Use Screenshots as Loading Screen: Enabling this options will copy any screenshots from the ship packages into the loadscr directory, so they will also be displayed as loading screens in the game.
- Base Mod Type: This is the method used to create the selected base mod
- Standard Mod: This will put the base mod files into the PluginManager mod files, This is the recommended option, use this unless you have problems with the base mod selection
- Fake Patch: This will copy the selected base mod into a fake patch and rename it in sequence, allowing it to keep the base mod and ship files seperate.
- File System Handling: The file system is how the ship files are installed, mainly for those that have problems with adding them to mod files
- Single Mod Files: This will put all the ship files into a standard mod catalog file to be loaded into the game
- Extracted to Directories: This will put all the files into seperate directories in the main X3 Directory. This is to avoid the problems of mod file handling, only use if you are experiencing these problems
- Cockpits: You can select which ships will have cockpits, as some Ship Packages have a cockpit set that you might not want, you can disable them without changing the XSP file.
- Individual Ship Cockpits: This just uses what ever settings are in the XSP files for thier cockpits
- Standard Cockpits: This will make all ships have thier standard cockpits, ie, if the ship is an Argon M3, it will have the standard Argon M3 cockpit, rather than the one thats set in the XSP file.
- None: This will disable all the cockpits for the installed ships
5. Profiles

These options are conencted directly to the Mod Profile System.
- Creation of Profiles upon Installing Mods: When you install a package that contains a mod, the installer can create a profile automatically.
- Ask me When Installing: when you install a mod, you will be asked if you want to create a profile
- Automatically Add Profile: This will skip the asking and always a new profile for all mods that are installed
- Let me Add Them Manually: This will ignore the isntalled mods, so you have to goto the Mod Profiles tab to add any profiles you like.
One you have set the desired options, then click on the "Save" button.
Clicking on "Cancel" will disregared any changes made.